 Save
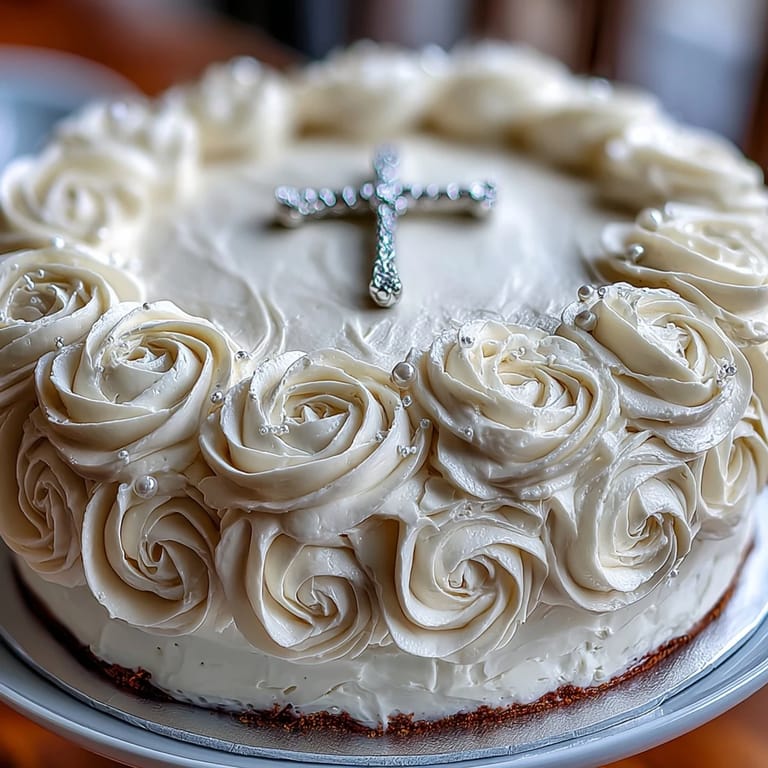
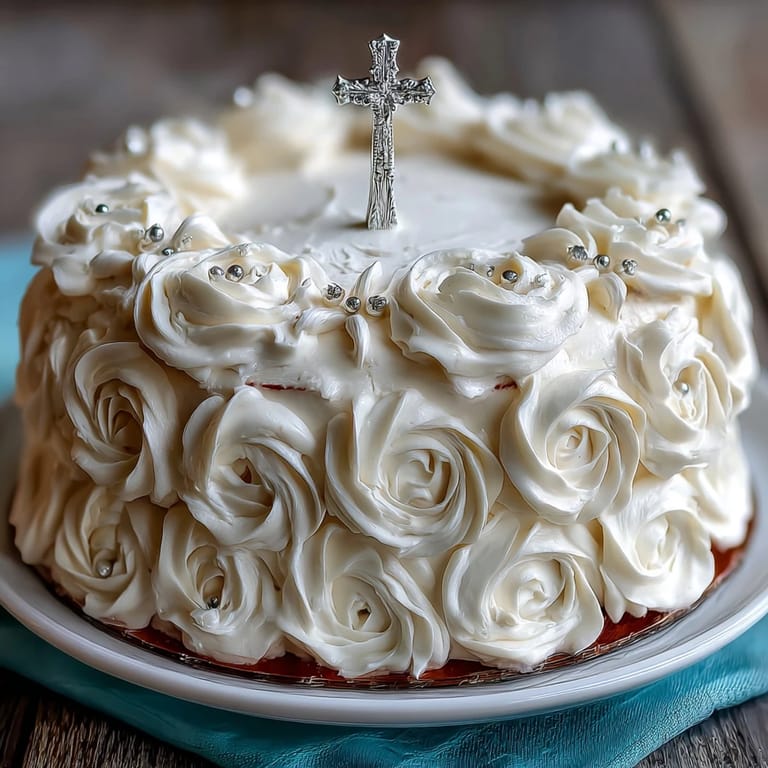
Save My aunt asked me to bake her daughter's First Communion cake three weeks before the event, and I won't lie—I panicked a little. But standing in my kitchen that Saturday morning, measuring out flour and softening butter, something clicked. This cake isn't fussy or intimidating once you realize it's just a tender vanilla sponge dressed up with buttercream and fondant roses. Years later, watching people's faces light up when they see those delicate white roses and the cross topper still gives me the same quiet satisfaction.
I'll never forget watching my cousin eat a slice at her daughter's Communion party, tears in her eyes, saying it tasted like love. That's when I understood—this cake is more than sugar and butter; it carries the weight of a moment, a milestone, a family gathering around something beautiful and homemade.
Ingredients
- All-purpose flour (2 ½ cups): The foundation of a tender crumb; measuring by weight is honestly the easiest way to avoid a dense cake.
- Baking powder (2 ½ tsp): This is your lightness guarantee, but don't skip the sifting step with the flour.
- Salt (½ tsp): A small amount amplifies vanilla and balances sweetness without announcing itself.
- Unsalted butter (1 cup for sponge): Room temperature butter creams better and creates a finer crumb than cold butter.
- Granulated sugar (2 cups): Creaming this with butter for three minutes is non-negotiable—that's where the tender texture lives.
- Large eggs (4): Room temperature eggs incorporate more evenly and create better emulsion with the butter.
- Pure vanilla extract (1 tbsp for sponge): Real vanilla makes a noticeable difference; don't use imitation here.
- Whole milk (1 cup): Room temperature milk prevents temperature shock when alternating with dry ingredients.
- Unsalted butter (1 ½ cups for frosting): Softened butter whips into fluffy frosting that's dreamy to spread and pipe.
- Powdered sugar (5 cups): Sifting removes lumps that would create a grainy frosting.
- Pure vanilla extract (2 tsp for frosting): Frosting needs a generous dose of vanilla since there's no other flavoring competing for attention.
- Whole milk or heavy cream (3–4 tbsp): Add slowly—too much and you'll have slippery frosting that won't hold detail work.
- White fondant (16 oz): Quality fondant rolls smoother and tastes less like plastic; store it sealed after opening.
- Green gel food coloring: Gel is better than liquid because it won't loosen your fondant as you knead it in.
- Edible pearls or silver dragees: These are optional but they catch light and add that wedding-cake sparkle.
- Cross topper: Buy a food-safe decorative one online or use an edible version—this is your focal point.
Tired of Takeout? 🥡
Get 10 meals you can make faster than delivery arrives. Seriously.
One email. No spam. Unsubscribe anytime.
Instructions
- Prepare your pans and preheat:
- Get your oven to 350°F and grease those cake pans generously—use butter, not cooking spray, because it creates a better crust. Line the bottoms with parchment paper so your layers slide out without sticking.
- Combine your dry ingredients:
- Whisk flour, baking powder, and salt together in a medium bowl. This distributes the leavening evenly so you don't get dense spots.
- Cream butter and sugar:
- Beat them together for a full three minutes until it's pale, fluffy, and looks almost like frosting. This incorporates air into the batter, which is what makes the cake tender and light.
- Add eggs one at a time:
- Drop in each egg and beat well before adding the next one. If your eggs are cold, they'll break the emulsion and create a grainy batter—that's why room temperature matters.
- Mix in vanilla:
- Alternate dry and wet ingredients:
- Switch to low speed and add the flour mixture and milk back and forth, starting and ending with flour. This prevents overmixing, which toughens the cake.
- Divide and bake:
- Pour batter evenly into your pans and smooth the tops. Bake for 30–35 minutes until a toothpick comes out with just a few moist crumbs.
- Cool the cakes properly:
- Leave them in the pans for ten minutes so they firm up, then flip them onto wire racks to cool completely. Never frost a warm cake or the frosting will melt and slide.
- Make the buttercream:
- Beat softened butter until it's creamy, then gradually add powdered sugar so you don't create a cloud of sugar in your kitchen. Add vanilla, a pinch of salt, and milk or cream one tablespoon at a time until it's spreadable but holds peaks.
- Level and assemble:
- If your cake layers have domes, slice them off to create flat surfaces. Place the first layer on your cake board, spread a generous layer of buttercream, then top with the second layer.
- Apply a crumb coat:
- Spread a thin layer of frosting all over the cake, chill it for 20 minutes so crumbs don't pull into your final frosting layer. This step separates a polished cake from a messy-looking one.
- Frost smoothly:
- Apply your final, thicker layer of buttercream and smooth it with an offset spatula dipped in hot water. Take your time here—this is what people see first.
- Craft fondant roses:
- Roll small balls of fondant, flatten them into petals, then layer the petals into loose rose shapes. If your hands are dry, lightly dip your fingers in water so fondant doesn't crack.
- Tint and shape leaves:
- Knead green gel coloring into a small portion of fondant and roll out thin leaf shapes. Paint water on the back so they stick to the cake.
- Arrange your decorations:
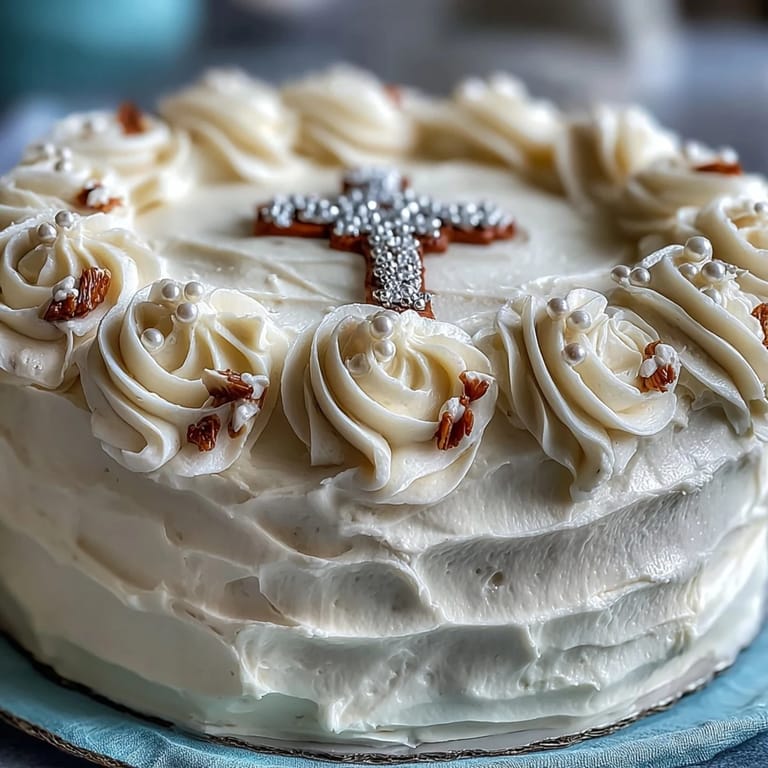
- Place fondant roses and leaves on the frosted cake however you like—a cluster around the base, scattered across the top, or forming a wreath. Add edible pearls or dragees to fill gaps and catch light.
- Crown with the cross:
- Position your cross topper at the center or wherever feels right for the design you've created. Step back and let it settle in.
- Chill before serving:
- Refrigerate the finished cake for at least an hour so the frosting sets and the fondant firms up slightly, making it easier to slice and serve cleanly.
 Save
Save My cousin still has a photo of that cake displayed on her kitchen shelf, and sometimes she tells people her sister made it. There's something about creating something this beautiful with your own hands that becomes part of the memory itself.
The Sponge That Never Disappoints
The vanilla sponge recipe here is genuinely forgiving. I've made it when I forgot to bring eggs to room temperature (filled the bowl with warm water, quick fix), and I've made it rushing through a Friday afternoon. What matters most is not overworking the batter once you add the flour. The moment it comes together, stop mixing. Overmixing activates gluten and toughens the cake, which is the opposite of what we want. If you're nervous, mix on low speed and give yourself permission to have a slightly denser crumb your first time—you'll still end up with something delicious.
Buttercream That Holds Its Shape
Buttercream is almost impossible to mess up if you respect the ratio of butter to sugar. Too little butter and it's grainy; too much and it's oily. The milk or cream is your texture tool—add it slowly, testing as you go. If you're piping roses or details, you want it stiffer; if you're smoothing it flat, you want it slightly softer. A helpful trick: if your frosting starts to break when you add milk, it's usually a temperature issue. Warm the bowl gently over steam or add a bit more softened butter and beat it until it comes back together silky and smooth.
Fondant Work and Making It Feel Natural
Fondant looks intimidating but is really just sugar dough that you can shape. The key is not overworking it—handle it as little as possible and keep your hands lightly moistened with water so it doesn't crack. When you're rolling out roses, think of each petal as a small, thin layer that curls up naturally; you're not sculpting, you're stacking and letting gravity do some of the work. If you've never worked with fondant before, practice rolling a rose or two on the side while the cake is chilling. Your second rose will look noticeably better than your first, and that progression is part of the joy.
- Keep fondant sealed in an airtight container after you open it, or it will dry out and become impossible to work with.
- If you don't love the look of white fondant roses, you can paint them with edible food coloring mixed with vodka or lemon juice for more delicate color.
- Fondant absorbs humidity from the air, so if it gets sticky, dust it with cornstarch or powdered sugar as you work.
 Save
Save This cake celebrates something real and joyful, and that comes through in every slice. Bake it with care and the people eating it will taste the love you put into it.
Q&A About the Recipe
- → How do I achieve moist vanilla sponge layers?
Ensure proper creaming of butter and sugar until fluffy, and alternate adding dry ingredients with milk to maintain batter moisture. Bake until a toothpick comes out clean.
- → What’s the best way to make smooth buttercream frosting?
Beat softened butter until creamy, gradually incorporate sifted powdered sugar and vanilla extract, and add milk or cream one tablespoon at a time for desired spreadability.
- → How can I shape the fondant roses delicately?
Roll small balls of fondant, flatten and thin out petals, then assemble them by overlapping petals into a rose shape. Tint some fondant green for leaves.
- → Can I substitute ingredients for dietary needs?
Yes, substitute half the butter with vegetable oil for lighter texture or use gluten-free flour blend for gluten-free variations.
- → What tools help with fondant decoration?
Use fondant tools or a small knife to shape petals, a rolling pin to thin the fondant, and an offset spatula for smooth buttercream application.