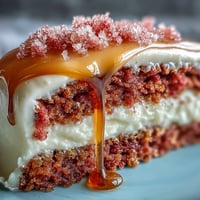
 Save
Save My cousin texted me three weeks before graduation asking if I could make something special for the celebration—something that screamed school spirit but wasn't just the typical sheet cake everyone brings. Standing in my kitchen that afternoon, surrounded by boxes of cake mix and candy melts in our alma mater's colors, I realized these little cake pops could be tiny edible fireworks, each one a burst of pride and gold sparkle. They felt like the perfect way to mark a moment that deserved more than ordinary.
I made my first batch on a Thursday evening while my daughter quizzed herself for finals, and watching her pop one in her mouth between practice problems—that little moment of joy in the middle of exam season—I knew I'd nailed it. The gold sprinkles caught the kitchen light, and suddenly this wasn't just about graduation anymore; it was about celebrating every small win leading up to it.
Ingredients
- 1 box vanilla or chocolate cake mix (plus required ingredients): Don't skip baking from scratch if you're feeling ambitious, but honestly, the mix gives you a reliable texture that holds together beautifully when crumbled.
- 1/2 cup unsalted butter, softened: Room temperature is non-negotiable here—cold butter won't cream properly and your frosting will be gritty instead of silky.
- 1 1/2 cups powdered sugar: Sift it first if you have a few minutes; it prevents lumps that catch between your teeth.
- 1 tablespoon milk: Any kind works, but whole milk gives the frosting a richer feel.
- 1 teaspoon vanilla extract: Use real vanilla if you can—it makes a subtle but noticeable difference in the flavor.
- Pinch of salt: This tiny amount balances the sweetness and makes everything taste less cloying.
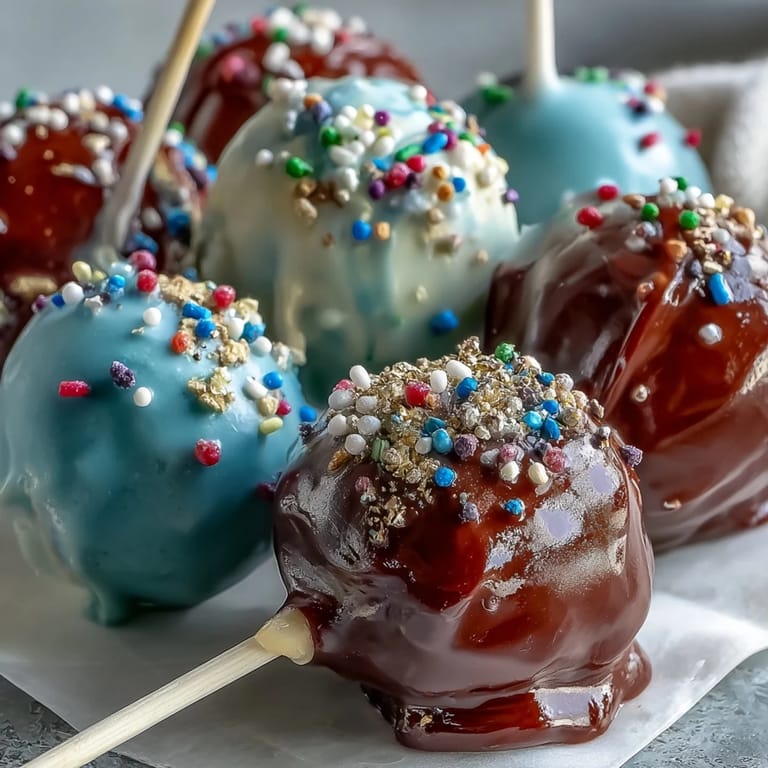
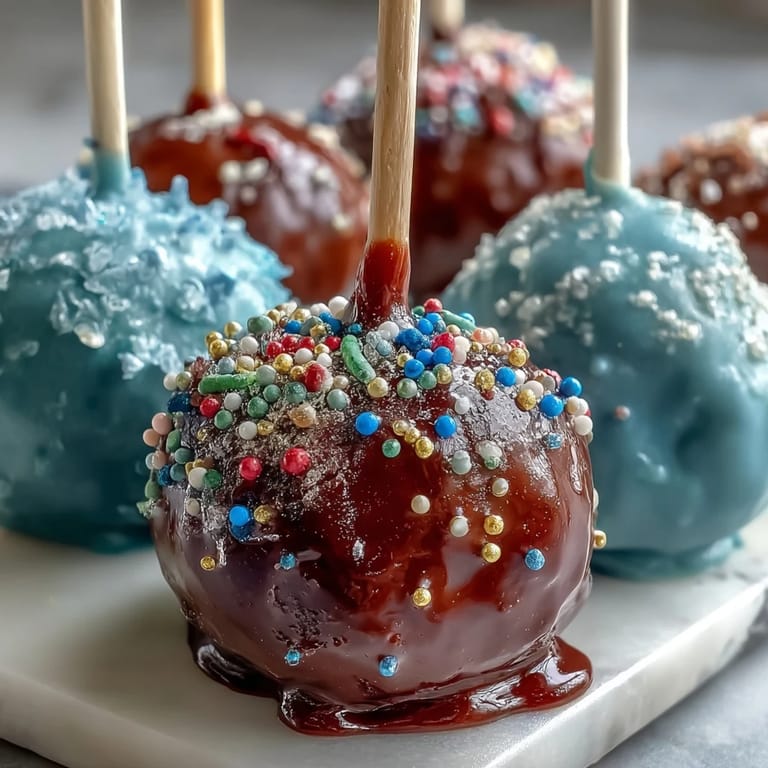
- 450 g candy melts in two school colors: Buy a little extra in case of dipping mishaps; melts are forgiving but you'll want backup.
- 2 tablespoons vegetable shortening or coconut oil: This is the secret to smooth dipping—candy melts alone can be thick and clumpy.
- Gold sprinkles or edible gold glitter: The finishing touch that transforms these from nice to absolutely stunning.
- 24 lollipop sticks: Get the regular size, not the jumbo ones, or your cake pops will feel unbalanced.
- Styrofoam block: This holds everything upright while coating sets—you can also use a block of floral foam in a pinch.
Tired of Takeout? 🥡
Get 10 meals you can make faster than delivery arrives. Seriously.
One email. No spam. Unsubscribe anytime.
Instructions
- Bake your cake base:
- Follow the box instructions like you're reading a love letter—don't skip steps or eyeball measurements. Once it comes out golden and a toothpick emerges clean, let it cool completely on a wire rack, because warm cake will make your frosting melt into a sad puddle.
- Whip the frosting:
- With your mixer on medium speed, beat the softened butter until it's pale and fluffy—this takes about two minutes and honestly sounds like tiny applause for your impending success. Add the powdered sugar slowly, then milk, vanilla, and salt, beating until everything is light and spreadable.
- Crumble and combine:
- Once the cake is completely cool, break it into small pieces with your hands—there's something therapeutic about this part. Mix in the frosting bit by bit until the texture resembles damp sand that holds together when squeezed but doesn't feel wet or oily.
- Roll your balls:
- Using a tablespoon or a small cookie scoop, form 24 evenly-sized balls and place them on parchment paper. Even sizing matters more than you'd think—uneven pops look sloppy and cook unevenly when dipped.
- Chill them down:
- Refrigerate for at least an hour, or pop them in the freezer for 30 minutes if you're in a hurry. Cold cake balls hold their shape during dipping instead of sliding off the stick halfway through.
- Secure those sticks:
- Melt a small amount of candy melts and dip the end of each stick, then push it halfway into each cake ball—this anchor prevents the pop from spinning loose while you're dipping. Wait a minute for the candy to set before moving on.
- Dip into color:
- Melt your school-colored candy melts according to package directions, stirring in a tablespoon or two of shortening if the melts seem thick. Dip each pop into the candy, then gently tap off the excess while rotating slowly—this gives you an even coat without pools of excess dripping off.
- Sprinkle while wet:
- The gold sprinkles only stick if you apply them while the candy coating is still slightly tacky, so don't hesitate—this is your 30-second window. Tap any loose sprinkles away once they've set.
- Let them set:
- Place each pop upright in the Styrofoam block and resist the urge to touch them for at least two hours, preferably overnight. This patience pays off in a glossy, professional-looking finish.
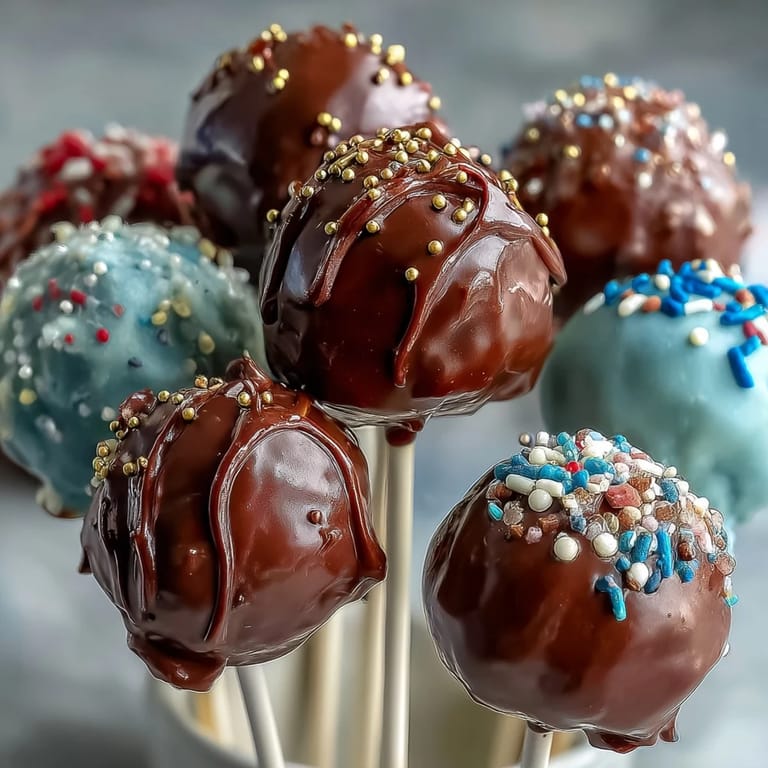
 Save
Save At the actual graduation party, watching people pick up these little gems and actually pause to admire them before eating—that's when I understood why homemade matters. One girl told me they were too pretty to eat, then ate three more anyway, and somehow that was the exact compliment these pops deserved.
Choosing Your Colors Right
The magic of these cake pops lives in committing to your school's actual colors, not approximating them. When I first made these, I grabbed a generic blue and red, and they looked patriotic but impersonal. Going back to order the exact shade of cardinal red and navy blue our school used felt like such a small thing, but when guests saw them, they immediately felt special and specific, not generic.
Timing and Prep Strategy
Make the cake and frosting the day before your event if possible—this spreads the work across two days and lets you shape and chill everything overnight, which actually makes the next day's dipping way easier. I've done this both ways, rushed in one day and spread across two, and the calm of spreading it out means better-looking pops and way less frustration.
Making Them Extra Special
Beyond gold sprinkles, there are small touches that turn these from nice to memorable. I've seen people add thin ribbons in school colors tied around the sticks, tiny name tags attached with toothpicks for assigned pops, or even custom labels on a display table explaining what they are. The effort shows, and people notice.
- If you're making these for a specific school, check their official colors online—most schools have them listed on their website or athletics page.
- Edible gold glitter looks more elegant than sprinkles if you want a sophisticated vibe, though regular gold sprinkles are more fun and easier to find.
- Store finished pops in an airtight container at room temperature for up to three days, or refrigerate for a week if you're making them well in advance.
 Save
Save These cake pops became the unexpected star of that graduation party, and I realized something simple: celebrating people we care about doesn't have to be complicated, just thoughtful. There's real power in showing up with something made by your own hands.
Q&A About the Recipe
- → What cake flavors work best for vibrant cake pops?
Vanilla and chocolate cake mixes hold structure well and provide a neutral base that pairs beautifully with colorful coatings.
- → How do I achieve smooth candy coating on the cake pops?
Melting candy melts gently and adding a bit of vegetable shortening or coconut oil helps create a smoother, shinier coating that's easier to dip.
- → What’s the best way to secure sticks in the cake balls?
Dipping the end of the stick into melted candy before inserting it halfway into the chilled cake ball helps secure it firmly without falling out.
- → How can I make the pops visually festive for graduation?
Use candy melts in your school’s colors and finish with gold sprinkles or edible glitter to add sparkle and celebratory flair.
- → How should I store these cake pops to maintain freshness?
Keep cake pops in an airtight container at room temperature up to 3 days or refrigerate for up to a week to preserve taste and texture.